Joomla!
![]() Joomla! is an open-source content
management system used for creating Web content. It is written in PHP and makes use of a
MySQL database for storing data and uses object-oriented programming techniques. It is
one of the most popular content management systems owing to its features such as page
caching, multi-language support, plugins, and extensions.
Joomla! is an open-source content
management system used for creating Web content. It is written in PHP and makes use of a
MySQL database for storing data and uses object-oriented programming techniques. It is
one of the most popular content management systems owing to its features such as page
caching, multi-language support, plugins, and extensions.
![[Note]](images/admon/note.png) | Note |
|---|---|
|
Joomla! plugin is only available in CodeLobster IDE Professional. |
CodeLobster IDE integrates with Joomla! so you can use it from inside the IDE. Joomla! support includes the following features:
Creating a Joomla! project
If you have no application yet, you can generate a CodeLobster IDE project with Joomla! - specific structure from a template. Joomla! plugin has the wizard that helps you to get and install the latest official framework release.
To create Joomla! project:
-
Choose main menu item. Select Joomla! framework item in the opened dialog.
or
Select main menu item
-
Define project location, name and project URL for debugging.
Note If you enable Create project in a new folder option CodeLobster IDE creates a subfolder with the project name.
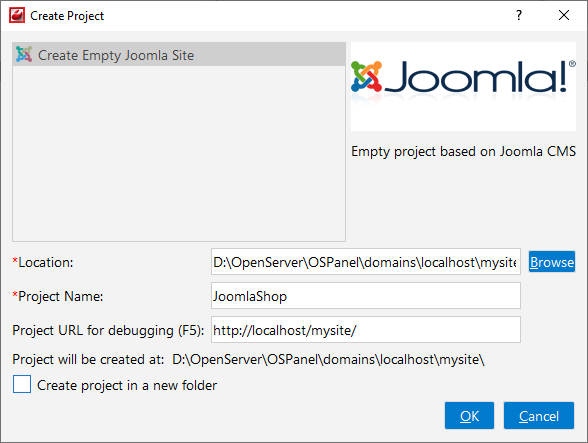
-
Click the button.
-
Select a version of Joomla! framework.
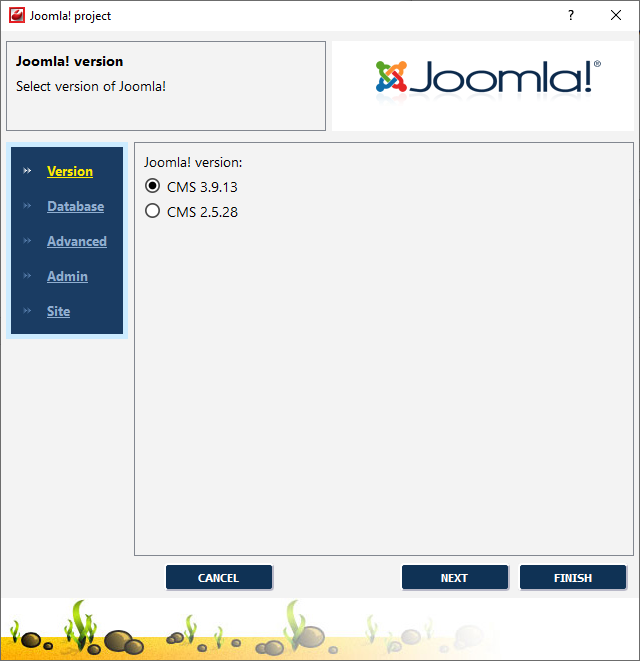
-
Click the button.
-
Define database parameters:
-
Database name - the name of the MySQL database where your project data will be stored.
-
User name - used to connect with MySQL server.
-
User password - used to connect with MySQL server.
-
Root login - used to create a MySQL user.
-
Root password - used to create a MySQL user.
-
-
Click the button.
-
Specify some advanced database options:
-
Database host - specify a host name, if your database is located on a different server.
-
Database port - specify database port, if it runs on a non-standard port.
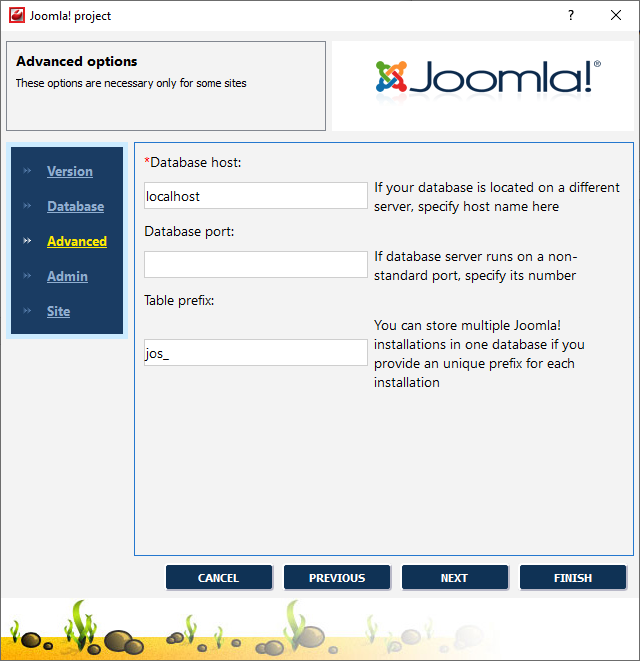
-
-
Enter information for administrator account:
-
Administrator login
-
Administrator password
-
Administrator email
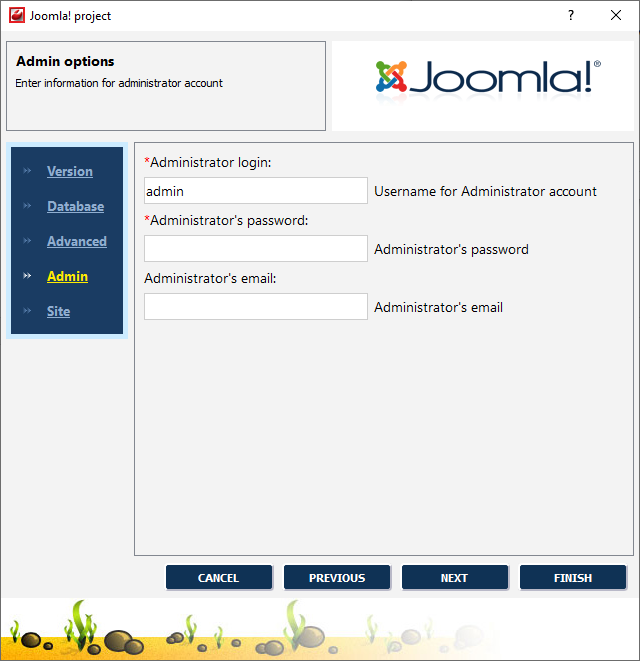
-
-
Specify your Joomla! site settings:
-
Site name - your website name.
-
Secret - random sequence of alphanumeric characters in upper and lower case.
-
Tmp path - absolute path to the tmp directory within the root directory of Joomla! installation.
-
Log path - absolute path to web server log directory.
-
Mail from - your website email address.
-
From name - you website name in "Send from".
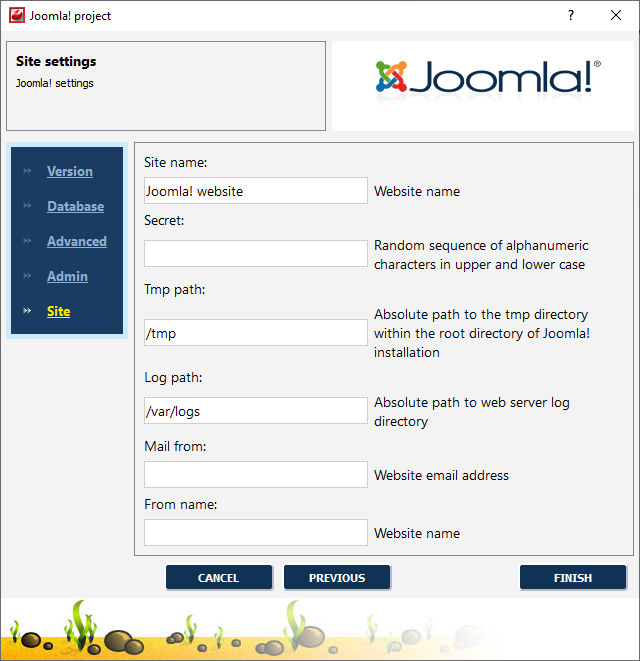
-
-
Click the button to create Joomla! project.
Creating Joomla! module
CodeLobster IDE offers you the wizard to create a new Joomla! MVC with all necessary files.
To create Joomla! module:
-
Select main menu item.
-
Specify Module name for a new module.
-
Define the path to the Joomla! modules directory using the button.
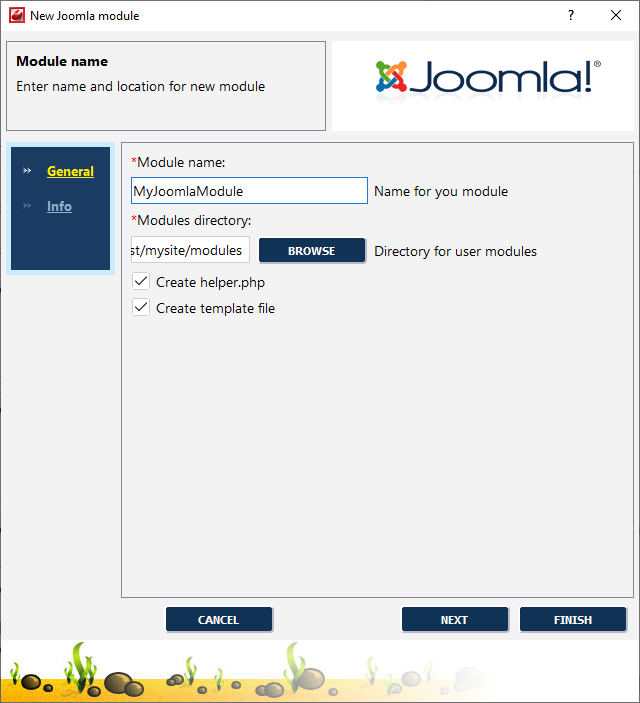
-
Click the button.
-
Enter information about your module.
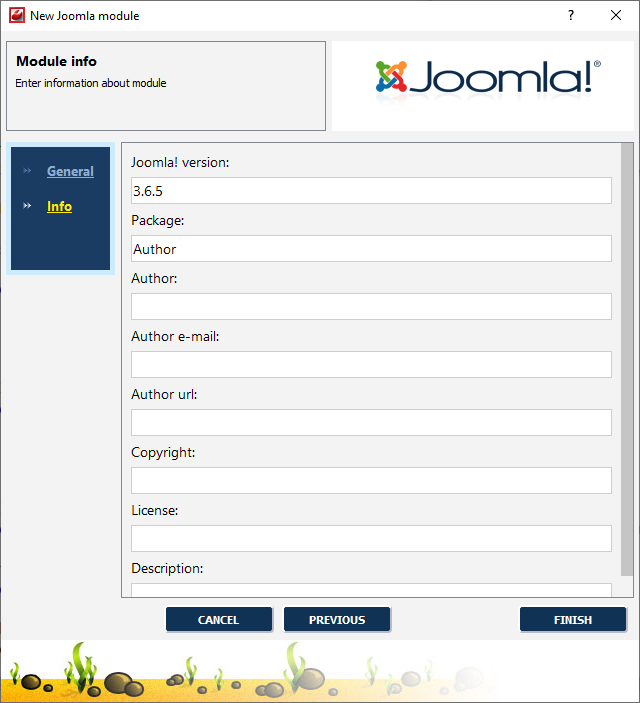
-
Click the Finish button to create Joomla! module.
CodeLobster IDE creates module files and corresponding
.xmlfile:<?xml version="1.0" encoding="utf-8"?> <extension type="module" version="3.6.5" client="site" method="upgrade"> <name>MyJoomlaModule</name> <author>Author name</author> <creationDate>January 2020</creationDate> <copyright></copyright> <license></license> <authorEmail></authorEmail> <authorUrl></authorUrl> <version>1.0</version> <description></description> <files> <filename module="mod_myjoomlamodule">mod_myjoomlamodule.php</filename> <filename>index.html</filename> <filename>helper.php</filename> <folder>tmpl</folder> </files> </extension>
Creating Joomla! component
CodeLobster IDE offers you the wizard to create a new Joomla! component with all necessary files.
To create Joomla! component:
-
Select main menu item.
-
Specify Component name for new component.
-
Define the path to the Joomla! component directory using the button.
-
If necessary set up additional options
-
Create component for admin
Note Specify the directory for admin components.
-
Create model
-
Create model for admin

-
-
Click the button.
-
Enter information about your component.

-
Click the button to create Joomla! component.
CodeLobster IDE creates component files and corresponding
.xmlfile:<?xml version="1.0" encoding="utf-8"?> <extension type="component" version="3.6.5" method="upgrade" > <name>MyJoomlaComp</name> <author></author> <creationDate></creationDate> <copyright></copyright> <license></license> <authorEmail></authorEmail> <authorUrl></authorUrl> <version>1.0</version> <description></description> <files folder="site"> <filename>myjoomlacomp.php</filename> <filename>controller.php</filename> <filename>index.html</filename> <folder>views</folder> <folder>language</folder> <folder>models</folder> </files> </extension>
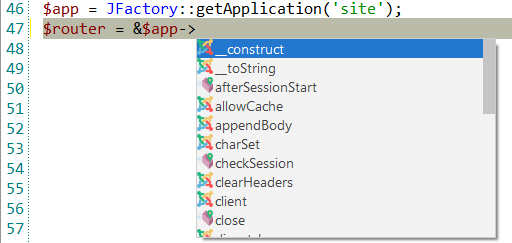
Joomla! IntelliSense
CodeLobster IDE provides IntelliSense for Joomla!, that helps you write code more quickly and efficiently. IntelliSense saves you time by putting what you’re most likely to use at the top of your completion list. IntelliSense suggestion box includes Joomla! CMS classes.
The suggestion list of the automatic completion appears as soon as you start typing. Pressing Tab or Enter will insert the selected item. You can trigger IntelliSense in the Editor window by pressing Ctrl + Space or using main menu item.
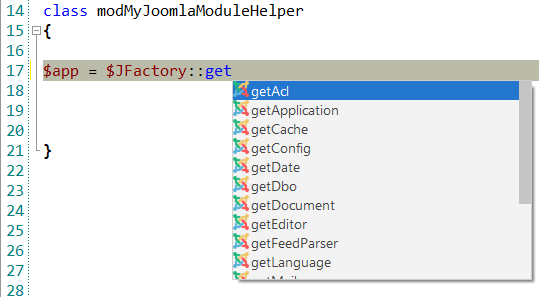
Furthermore, IntelliSense supports Joomla! variables and methods.
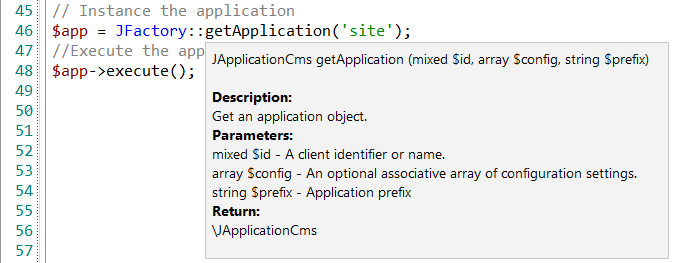
Tooltips for Joomla!
Hover mouse for tooltips that includes descriptions for Joomla! functions. Tooltips appear automatically when you hover the pointer over a function or some other element.
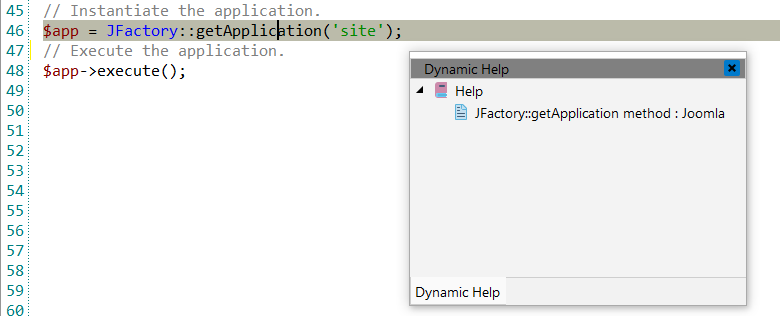
Joomla! context and dynamic help
The Dynamic Help window allows opening help topics automatically for an element when the pointer is placed on. Joomla! plugin uses the http://www.joomla.org/ for a quick search for relevant information.
To get help topics using Dynamic Help:
-
Place the pointer on the target element and press the F1 button.
-
Select main menu item.
-
Click the topic item in the Dynamic Help window.
![[Tip]](images/admon/tip.png) | Tip |
|---|---|
|
To get Dynamic Help to appear, choose main menu item. |