CakePHP
![]() CakePHP is a rapid development framework for
PHP which uses commonly known design patterns like Associative Data Mapping, Front
Controller, and MVC. The primary goal is to provide a structured framework that enables
PHP users at all levels to rapidly develop robust web applications, without any loss to
flexibility.
CakePHP is a rapid development framework for
PHP which uses commonly known design patterns like Associative Data Mapping, Front
Controller, and MVC. The primary goal is to provide a structured framework that enables
PHP users at all levels to rapidly develop robust web applications, without any loss to
flexibility.
![[Note]](images/admon/note.png) | Note |
|---|---|
|
CakePHP plugin is only available in CodeLobster IDE Professional. |
CodeLobster IDE integrates with CakePHP so you can use it from inside the IDE. CakePHP support includes the following features:
Creating a CakePHP project
If you have no application yet, you can generate a CodeLobster IDE project with CakePHP - specific structure from a template. CakePHP plugin has the wizard that helps you to get and install the latest official framework release.
In order to create CakePHP project:
-
Choose main menu item. Select CakePHP framework item in the opened dialog.
or
Select main menu item
-
Define project location, name and project URL for debugging.
![[Note]](images/admon/note.png)
Note If you enable Create project in a new folder option CodeLobster IDE creates a subfolder with the project name.
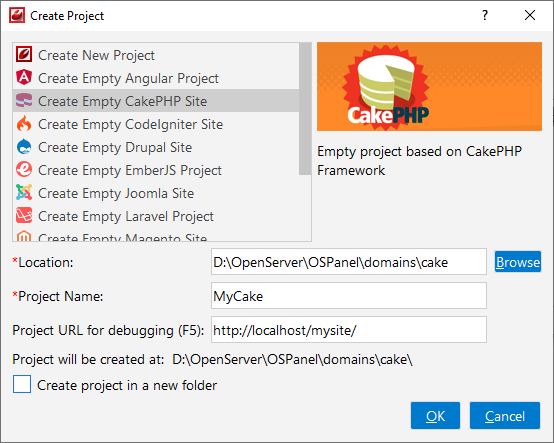
-
Click the button.
-
Enable Use Database option to setup your database.
![[Note]](images/admon/note.png)
Note You can skip this step and go further without creating database by clicking button.
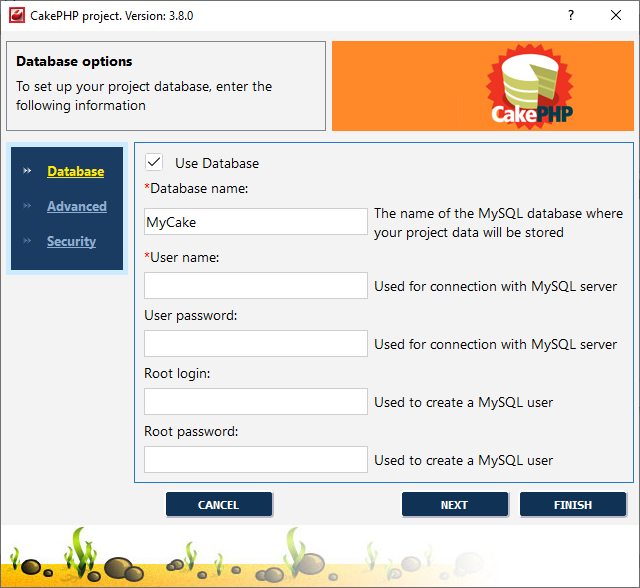
-
Define database parameters:
-
Database name - the name of the MySQL database where your project data will be stored.
-
User name - used to connect with MySQL server.
-
User password - used to connect with MySQL server.
-
Root login - used to create a MySQL user.
-
Root password - used to create a MySQL user.
-
-
Click the button.
-
Specify some advanced database options:
-
Database host - specify a host name, if your database is located on a different server.
-
Database port - specify database port, if it runs on a non-standard port.
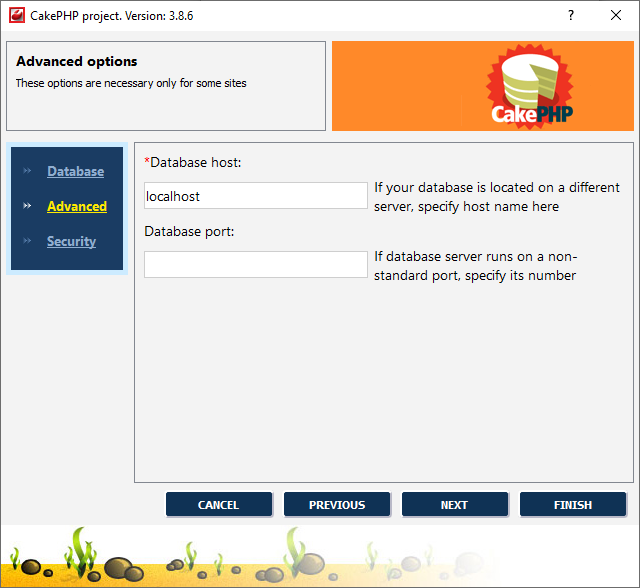
-
-
Your project security salt
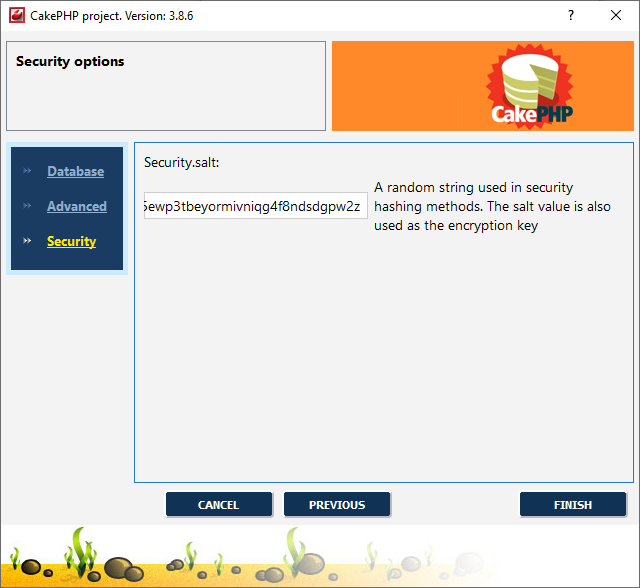
-
Click the button to create a CakePHP project.
Creating CakePHP MVC
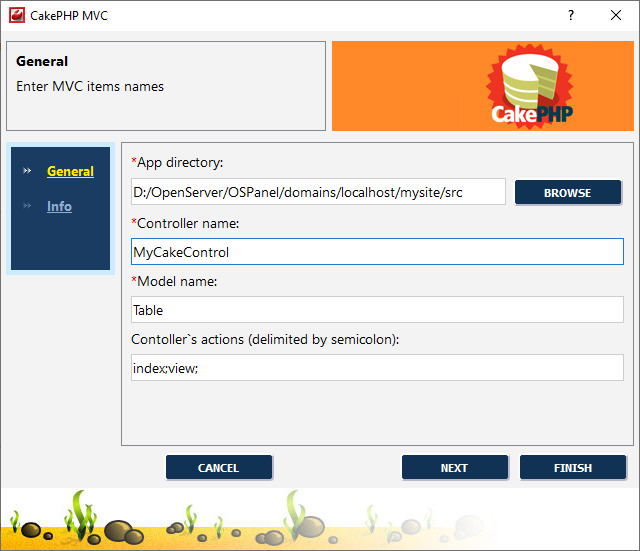
CakePHP plugin offers you the wizard to create a new MVC with all necessary files.
To create CakePHP MVC:
-
Select main menu item
-
Click the button to specify App directory.
-
Define MVC parameters:
-
Controller name.
-
Model name.
-
Controller's actions (delimited by semicolon)
-
-
Click the button.
-
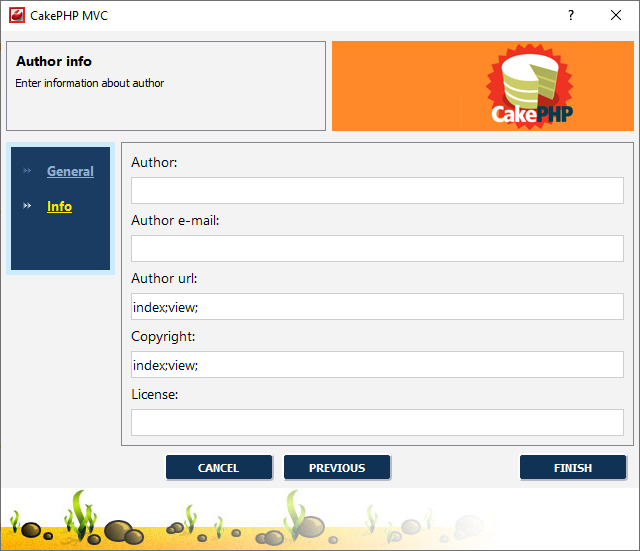
Enter information about the author.
-
Click the button to create a CakePHP project.
CakePHP IntelliSense
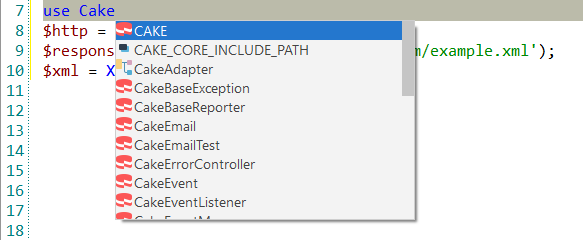
CodeLobster IDE provides IntelliSense for CakePHP, which helps you write code more quickly and efficiently. IntelliSense saves you time by putting what you're most likely to use at the top of your completion list. IntelliSense suggestion box includes CakePHP core helpers, core components, behavior.
The suggestion list of the automatic completion appears as soon as you start typing. Pressing Tab or Enter will insert the selected item. You can trigger IntelliSense in the Editor window by pressing Ctrl + Space or using main menu item.
Controller/View navigation
CodeLobster IDE can quickly switch between Controllers and Views in the Editor when developing. You can navigate between View (/app/View/ClassName/FuncName.ctp) and Controller (/app/Controller/ControllerName.php).
When you inside a Controller press Alt + O (or select main menu item) to jump to the corresponded View.
Tooltips for CakePHP
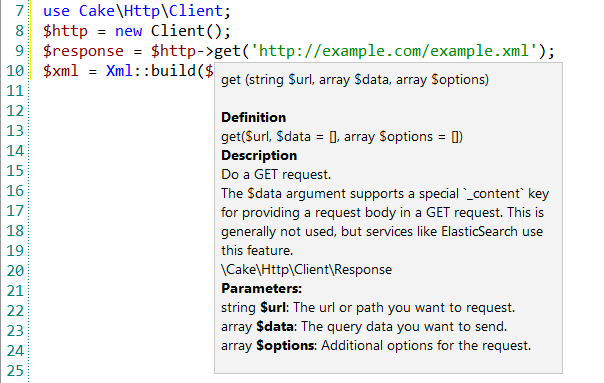
Hover mouse for tooltips that includes descriptions for CakePHP functions. Tooltips appear automatically when you hover the pointer over a function or some other element.
CakePHP context and dynamic help
The Dynamic Help window allows opening help topics automatically for an element when the pointer is placed on. CakePHP plugin uses the https://api.cakephp.org/ for a quick search for relevant information.
To get help topics using Dynamic Help:
-
Place the pointer on the target element and press the F1 button.
-
Select main menu item.
-
Click the topic item in the Dynamic Help window.
![[Tip]](images/admon/tip.png)
Tip To get Dynamic Help to appear, choose main menu item.
