Git support
CodeLobster IDE has integrated source control and includes Git support in-the-box. CodeLobster IDE will leverage your machine's Git installation, so you need to install Git first before you get these features.
![[Note]](images/admon/note.png) | Note |
|---|---|
|
Git support is a part of CodeLobster IDE - Professional version |
From within CodeLobster IDE, you can perform the following actions:
-
Work with branches
![[Caution]](images/admon/caution.png) | Caution |
|---|---|
|
|
You can run all commands in the Project Explorer by right-clicking on any file or folder name:
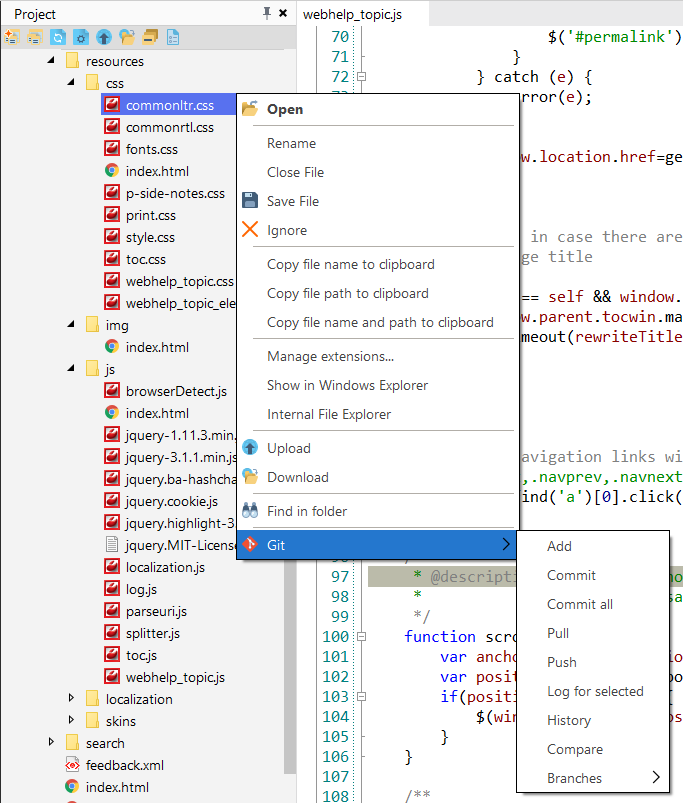
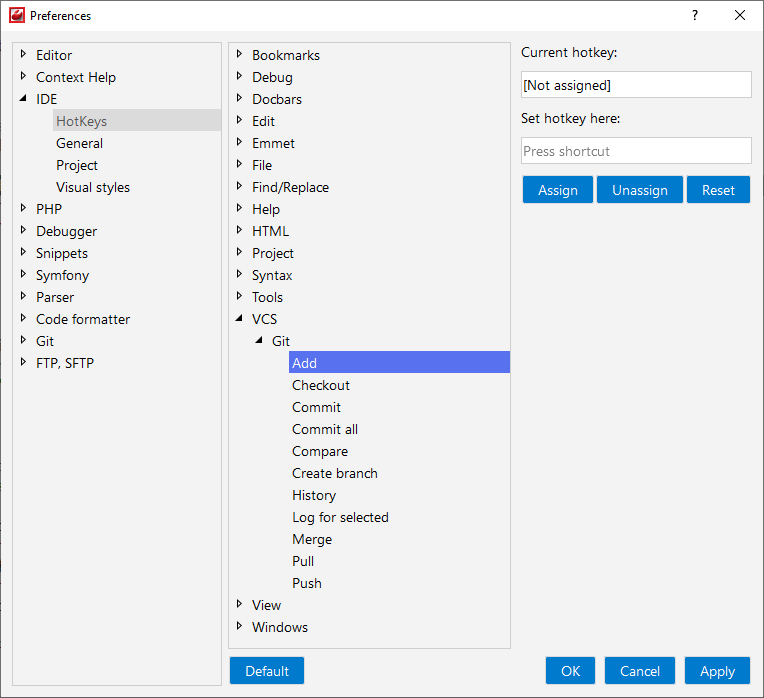
Also, you have an ability to assign any hotkeys in the Preferences for it: Hot Keys
Add files
If you want to add the file to your local repository, you should:
-
Select the files to add in the Project Explorer window and right-click to view the context menu.
-
Choose context menu item.
Staging and committing
To stage the files for committing:
-
Right-click in Explorer explorer window
-
Select context menu item.
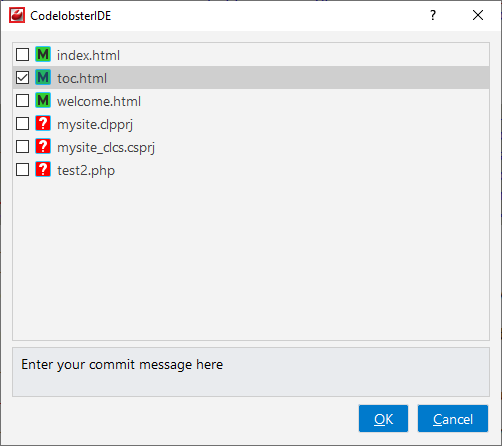
-
Stage the files for commit in the Stage files dialog.
A dialog box allows you to enter a commit message and stage files to commit will be processed
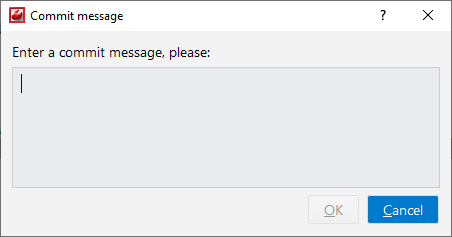
After staging the files, on the bottom of the view, you can provide a commit message and commit them to your local repository.
Commit all
You can stage all the files and commit by using the context menu item.
Pull
To push your local repository changes to the remote repository:
-
Right-click in the Project Explorer window on any file or folder.
-
Select context menu item.
Push
To bring the changes from the remote repository into your local repository
-
Right-click in the Project window on any file or folder.
-
Select the context menu item.
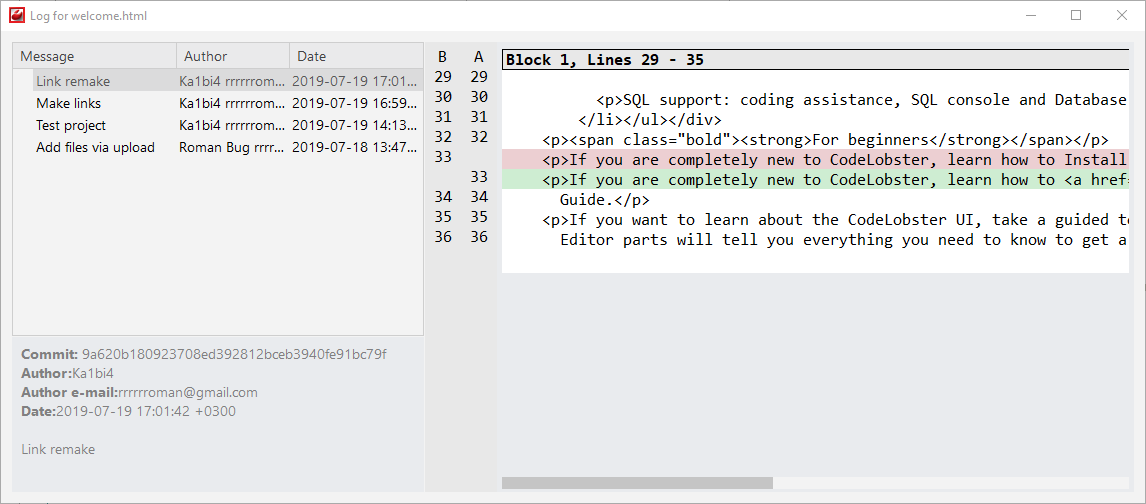
Log for selected
You can view the change history of an individual file in Git, complete details with what has changed. To view all the logs of a selected file:
-
Right-click in the Project window on the necessary file or folder.
-
Select the context menu item.
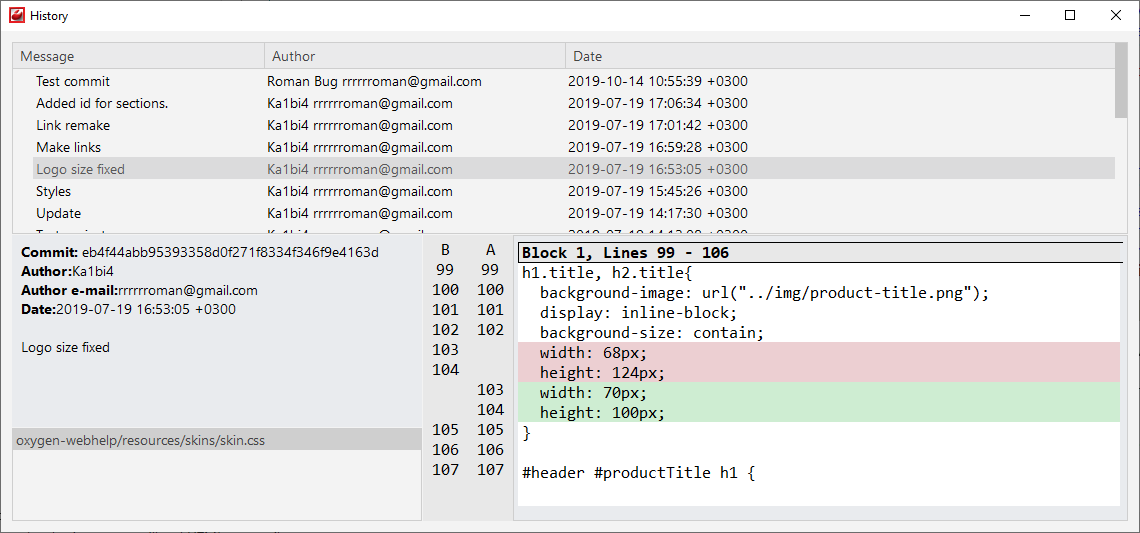
History
You can trace changes to lines in a file and discover how parts of the file evolved over time. To view file history:
-
Right-click in the Project Explorer window on the file.
-
Select Git | History menu item.
-
In the History dialog box, perform any of the following actions:
-
View details about the selected commit.
-
View files changes of the selected commit.
-
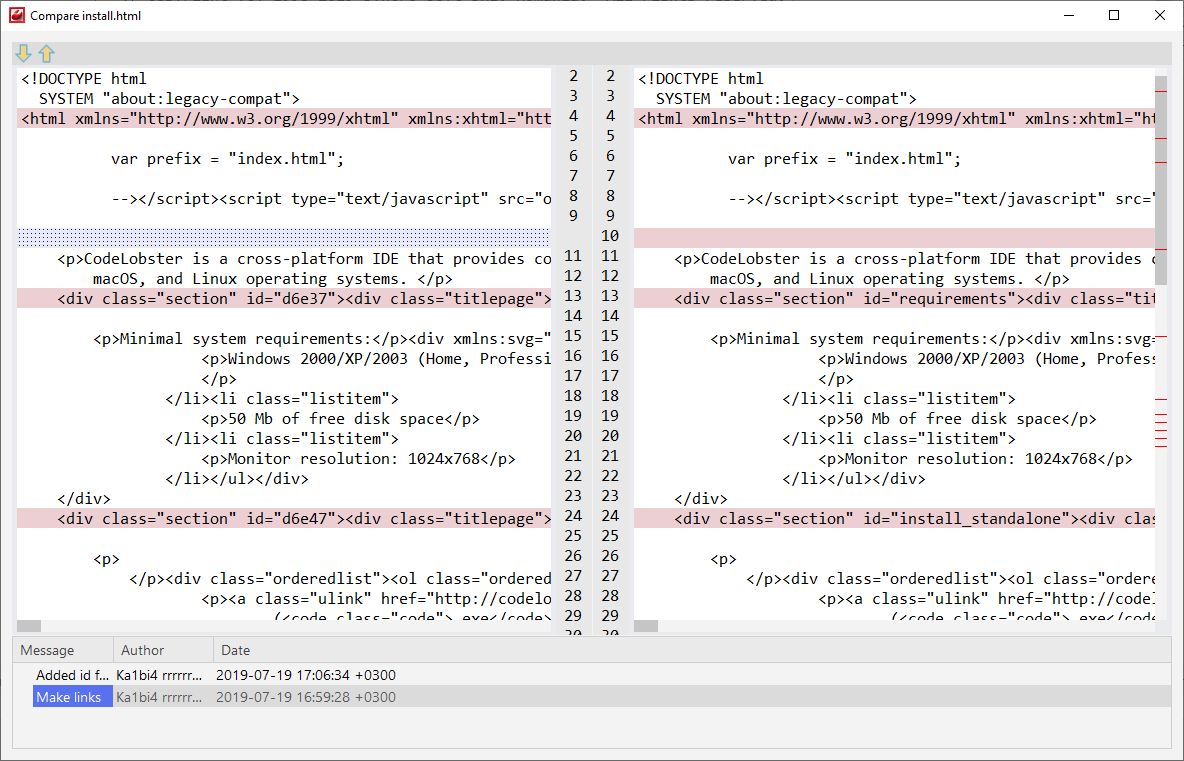
Compare
Compare command shows the difference between the current version of the file and any version in the repository:
-
Right-click in the Project Explorer window on the file.
-
Select menu item.
-
In the Compare dialog box, you can perform any of the following actions:
-
View file changes of the selected commit.
-
Work with branches
You can create, checkout, and merge branches directly within CodeLobster IDE.
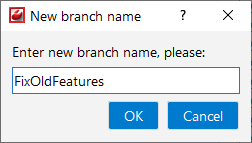
Create
Creates a new branch that contains your version of the document so that you can merge the changes at a later time after the conflicts have been solved. To create a new branch:
-
Right-click in the Project Explorer window on any file or folder.
-
Select context menu item.
-
Provide the name of your new branch and press . CodeLobster IDE creates the branch and switch to it.
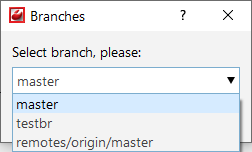
Checkout
To checkout to an existing branch:
-
Right-click in the Project Explorer window on any file or folder.
-
Select context menu item.
-
Choose the branch to switch.
Merge branches
To merge an existing branch with another one:
-
Right-click in the Project Explorer window on any file or folder.
-
Select context menu item.
-
Choose the branch to merge into.