Laravel
![]() Laravel is a web application framework with an
expressive, elegant syntax. Laravel is accessible, yet powerful, providing powerful
tools needed for large, robust applications. A superb inversion of control container,
sympathetic migration system, and tightly integrated unit testing support give you the
tools you need to build any application with which you are tasked.
Laravel is a web application framework with an
expressive, elegant syntax. Laravel is accessible, yet powerful, providing powerful
tools needed for large, robust applications. A superb inversion of control container,
sympathetic migration system, and tightly integrated unit testing support give you the
tools you need to build any application with which you are tasked.
![[Note]](images/admon/note.png) | Note |
|---|---|
|
Laravel plugin is only available in CodeLobster IDE Professional. |
CodeLobster IDE integrates with Laravel so you can use it from inside the IDE. Laravel support includes the following features:
Creating a Laravel project
If you have no application yet, you can generate a CodeLobster IDE project with Laravel - specific structure from a template. Laravel plugin has the wizard that helps you to get and install the latest official framework release.
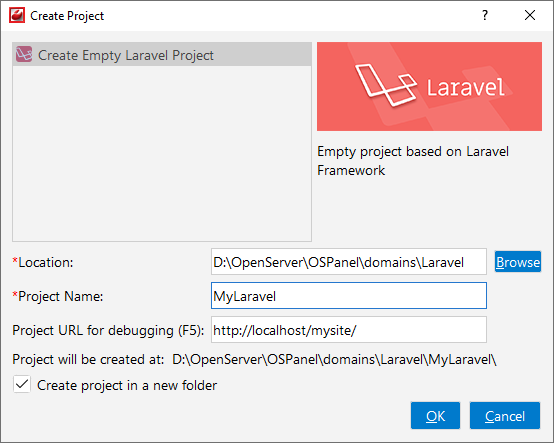
To create a Laravel project:
-
Choose main menu item. Select Laravel framework item in the opened dialog.
or
Select main menu item
-
Define project location, name and project URL for debugging.
Note If you enable Create project in a new folder option CodeLobster IDE creates a subfolder with the project name.
-
Click the button.
-
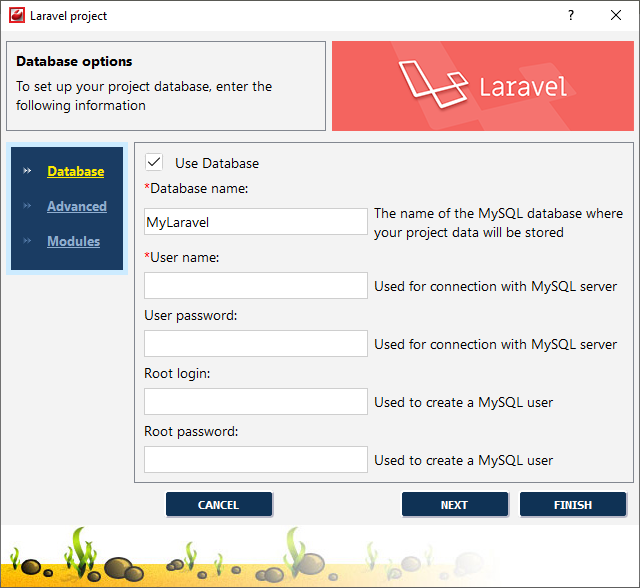
Enable Use Database option to setup your database.
Note You can skip this step and go further without creating database by clicking button.
-
Define database parameters:
-
Database name - the name of the MySQL database where your project data will be stored.
-
User name - used to connect with MySQL server.
-
User password - used to connect with MySQL server.
-
Root login - used to create a MySQL user.
-
Root password - used to create a MySQL user.
-
-
Click the button.
-
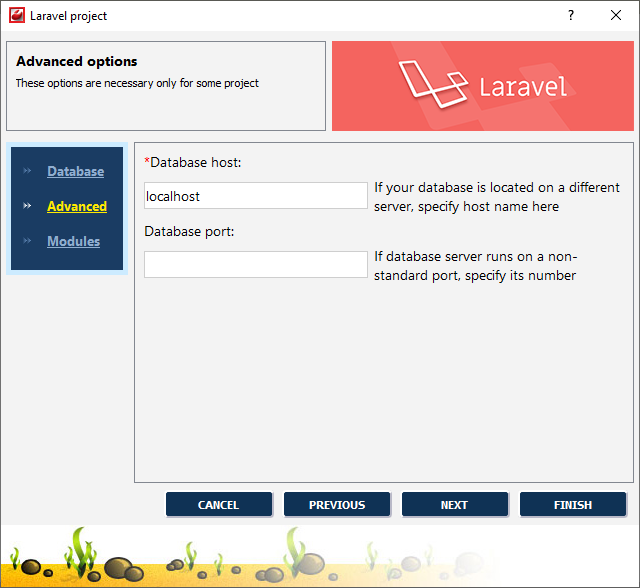
Specify some advanced database options:
-
Database host - specify a host name, if your database is located on a different server.
-
Database port - specify database port, if it runs on a non-standard port.
-
-
Click the button.
-
Check the necessary Laravel modules to install.
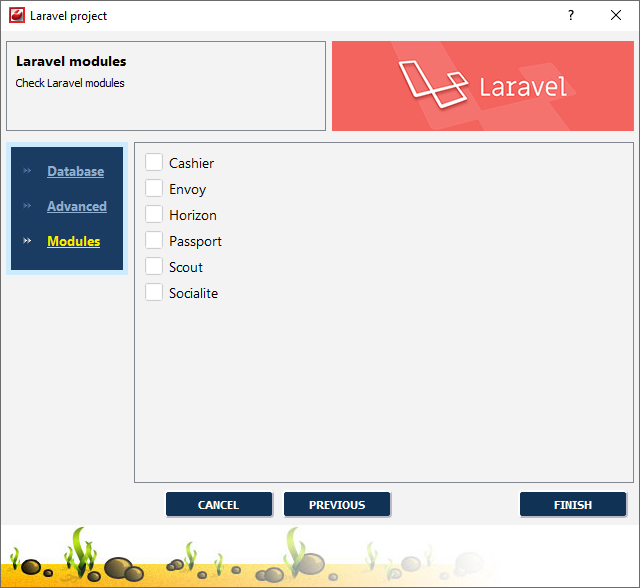
-
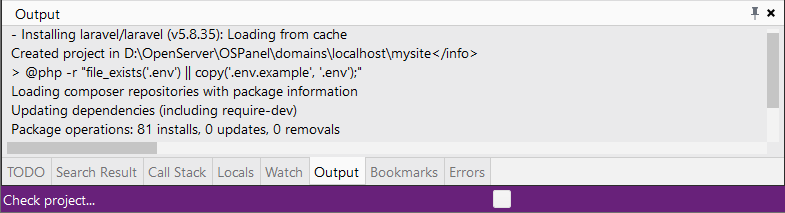
Click the button to create Laravel project.
The Output window will display installation status:
Laravel IntelliSense
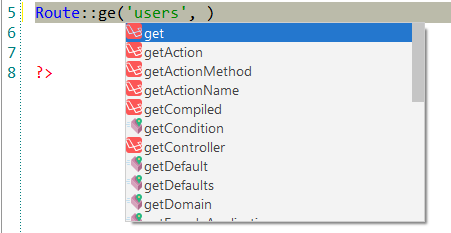
CodeLobster IDE provides IntelliSense for Laravel, that helps you write code more quickly and efficiently. IntelliSense saves you time by putting what you’re most likely to use at the top of your completion list. The suggestion list of the automatic completion appears as soon as you start typing. Pressing Tab or Enter will insert the selected item. You can trigger IntelliSense in the Editor window by pressing Ctrl + Space or using main menu item.
IntelliSense suggestion box includes Laravel class methods after
@.
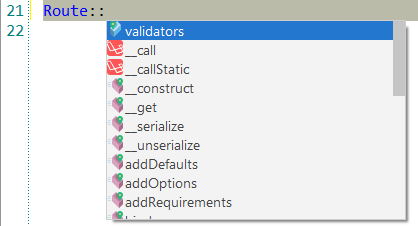
Furthermore, CodeLobster IDE offers autocomplete for Laravel facades:
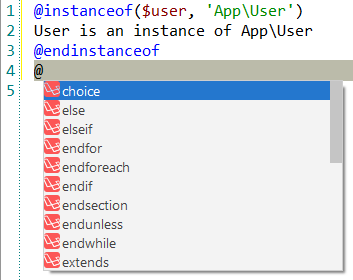
IntelliSense suggestion list also includes all Blade directives:
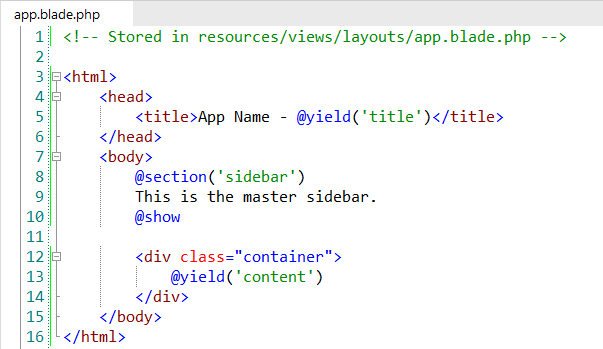
Syntax Highlighting for the Laravel Blade Template Engine
Blade is a simple and
powerful templating engine driven by view template inheritance and sections. All
Blade templates use the .blade.php extension. Laravel plugin
offers syntax highlighting for the Laravel Blade template engine.
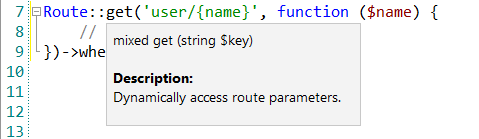
Tooltips for Laravel
Hover mouse for tooltips that includes descriptions for Laravel functions. Tooltips appear automatically when you hover the pointer over a function or some other element.
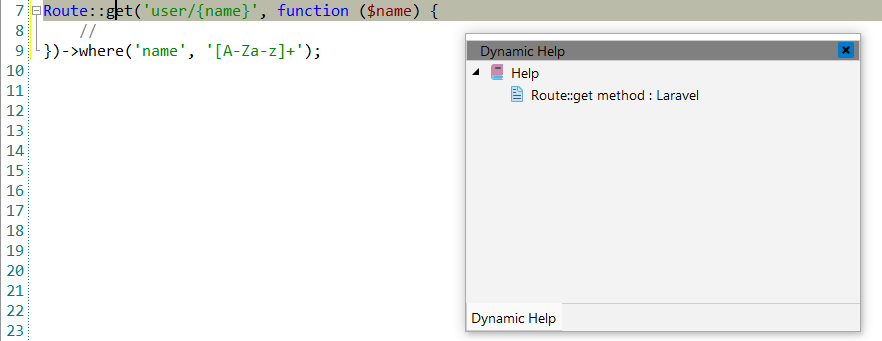
Laravel context and dynamic help
The Dynamic Help window allows opening help topics automatically for an element when the pointer is placed on. Laravel plugin uses the https://laravel.com/ for a quick search for relevant information.
To get help topics using Dynamic Help:
-
Place the pointer on the target element and press the F1 button.
-
Select main menu item.
-
Click the topic item in the Dynamic Help window.
![[Tip]](images/admon/tip.png) | Tip |
|---|---|
|
To get Dynamic Help to appear, choose main menu item. |